Source(google.com.pk)
It should be no surprise that around here we LOVE cupcakes. We love creating them, decorating them, frosting them, and certainly eating them! We get so many questions about cupcakes (especially about how to frost them) that I’ve been wanting to do a little comprehensive guide for a long time. I’m going to run through all of our best tips and tricks to get perfect, bakery-style cupcakes. Check out our Recipe Index for lots of great cupcake recipes (I’ll list my favorites at the bottom of this post). I’m going to start off with the most commonly asked frosting question, which is, “How do I make those big bakery-style swirls?”
Piping Bags
First off- you’ll need a piping bag. You can create your own by folding a parchment triangle (here’s a great how-to), or buy reusable plastic decorating bags, or disposable decorating bags (which, in reality can be washed and reused), and depending on the frosting you use, even a large zip-top bag works. If you do use a zip-top bag, I suggest a heavy duty one. And if you are using a particularly thick frosting, a stronger piping bag generally works better.
Piping Tips
The most important piece is the piping tip. You need to use a large or jumbo tip, which are much larger than a standard piping tip. Here’s a visual:
A lot of the cupcakes on our site are frosted with a Wilton 1M or 2D tip, which you can usually find at craft and cooking store wherever Wilton products are sold. They look like the tip in the middle in the photo above. Sometimes people try to frost cupcakes with those regular tiny tips and it just doesn’t work! But a step up from the large tips are jumbo tips, on the left in that photo. See how jumbo we’re talking about? That’s the tip I use 95% of the time I frost cupcakes. I got this set of moderately priced jumbo tips from Amazon a while back and they’ve been great.
If you’re just going to be using one color/flavor of frosting and one tip, then you can just pop the tip right into the bag, like this:
That’s what I usually do with my jumbo tips. If you want to change tips, you’ll want to use a coupler. Now, if you’re using a large tip- you’ll need a large coupler as well!
The giant coupler works for most large tips, but not all. I have some jumbo tips that are way too big for it. If you’ve never used a coupler, it works like this: Place the bottom part of the coupler on the inside of your bag, with the bag covering the threads. Then place a tip over the top of the coupler and secure the ring part of the coupler on top of it. this allows you to unscrew the tip at any time and attach another one.
Filling the Bag
(I’m going to explain the basic method, but if you really want to have your world rocked, check out this post about no-mess piping bags.) Once your bag is fitted with a tip, you’ll need to fill it up. This seems like a simple process, but can easily turn into one that involves cursing and the throwing of kitchen utensils. Admit it, you’ve been there. Don’t just hold the bag open and try to dump frosting in there. It will end poorly, I promise. For easy filling, roll the bag down as far as you possibly can. Either hold it in your hand (as shown in photo), or place the tip of the bag in a tall drinking glass with the bag hanging over the sides. Spoon your frosting into the bag directly into the tip and pressing down gently as you go, packing the frosting in to get rid of air bubbles. Slowly bring the edges of the bag up as needed to hold the frosting in. When it’s filled with enough frosting (Don’t over-fill, it becomes very hard to control) Twist the top of the bag closed.
Choosing a Tip
People are constantly asking about which piping tip to use to get the same looks as our photos. It’s hard to tell what the frosting is going to look like just by looking a the tip, so here’s some helpful photos. I pretty much use 4 tips the majority of the time, an open star tip, a closed star tip, a french tip, and a round tip. Of the four, my go-to are the star tips. I use the closed star if I wand a shorter “tower” of frosting, and if I’m using a really soft and silky frosting and I use the open star if I want a taller cupcake, or my frosting is thicker.
Can you see the difference? The star tips are the most common. The more “closed” your star, the more definition in the lines of your swirls. You’ll want to use nice smooth icing for closed star tips because any resistance will clog and make it hard to pipe out. Closed stars will give you the “ruffly” look if they’re quite closed.
And open star will give you a little bit of a thicker rope. The french tip has little tiny jagged edges and the round tip is pretty self-explanatory.
If you’re wondering why my frosting looks a little lumpy, it’s because I was photographing this project on my porch in near-freezing weather! The butter started to harden and made it hard to pipe. Not the prettiest, but still tastes heavenly!
How to Swirl:
Ah, now my frosting is soft and smooth. When you’re ready to pipe, hold your bag perpendicular to your cupcake. You’ll want to apply constant and even pressure and move in one fluid motion. Start on the outside edge, and make a circle around the border of the cupcake. As you get to the point where you started, continue in a circle, but move in a little overlapping your first circle to create a spiral.
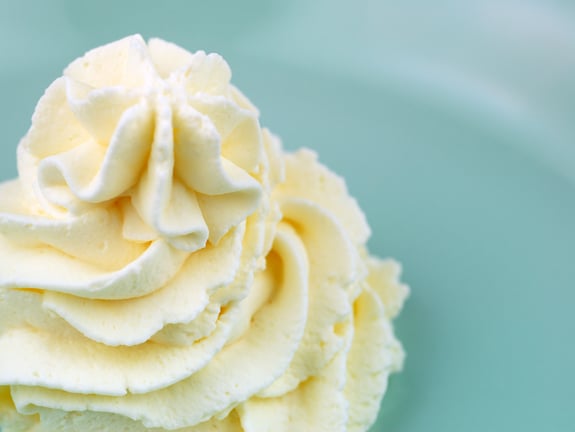
When you get to the top of the cupcake, stop! A very important step is to release pressure on the bag before you lift up. If you keep pressing, you will get little flags on the top of your cupcakes that look like santa hats. Release the pressure and then gently lift up and you’ll get a nice star top, like this:
Here’s a little video that will make it easier to see:
Now, you can use that exact same process, but in reverse, to create a flat rosette look. Instead of starting on the outside edge, start in the center and work your way out and you will get a little rose. See below the reverse rosette on the left, and the standard swirl on the right:
Cupcake Frosting Recipes For Cupcakes From Cupcake Wars From Sratch For Kids Vanilla for Halloween For Dogs And Cakes Pictures

Cupcake Frosting Recipes For Cupcakes From Cupcake Wars From Sratch For Kids Vanilla for Halloween For Dogs And Cakes Pictures

Cupcake Frosting Recipes For Cupcakes From Cupcake Wars From Sratch For Kids Vanilla for Halloween For Dogs And Cakes Pictures

Cupcake Frosting Recipes For Cupcakes From Cupcake Wars From Sratch For Kids Vanilla for Halloween For Dogs And Cakes Pictures

Cupcake Frosting Recipes For Cupcakes From Cupcake Wars From Sratch For Kids Vanilla for Halloween For Dogs And Cakes Pictures

Cupcake Frosting Recipes For Cupcakes From Cupcake Wars From Sratch For Kids Vanilla for Halloween For Dogs And Cakes Pictures

Cupcake Frosting Recipes For Cupcakes From Cupcake Wars From Sratch For Kids Vanilla for Halloween For Dogs And Cakes Pictures

Cupcake Frosting Recipes For Cupcakes From Cupcake Wars From Sratch For Kids Vanilla for Halloween For Dogs And Cakes Pictures

Cupcake Frosting Recipes For Cupcakes From Cupcake Wars From Sratch For Kids Vanilla for Halloween For Dogs And Cakes Pictures
Cupcake Frosting Recipes For Cupcakes From Cupcake Wars From Sratch For Kids Vanilla for Halloween For Dogs And Cakes Pictures

Cupcake Frosting Recipes For Cupcakes From Cupcake Wars From Sratch For Kids Vanilla for Halloween For Dogs And Cakes Pictures

Cupcake Frosting Recipes For Cupcakes From Cupcake Wars From Sratch For Kids Vanilla for Halloween For Dogs And Cakes Pictures

Cupcake Frosting Recipes For Cupcakes From Cupcake Wars From Sratch For Kids Vanilla for Halloween For Dogs And Cakes Pictures

Cupcake Frosting Recipes For Cupcakes From Cupcake Wars From Sratch For Kids Vanilla for Halloween For Dogs And Cakes Pictures

Cupcake Frosting Recipes For Cupcakes From Cupcake Wars From Sratch For Kids Vanilla for Halloween For Dogs And Cakes Pictures
No comments:
Post a Comment